Codiac Quickstart Guide 2: Walkthrough
This guide walks you through your Codiac environment after setup. Choose the path that matches how you got started:
- Sandbox Walkthrough - You chose "Hosted Sandbox" in the wizard
- Custom Stack Walkthrough - You're bringing your own cloud infrastructure
Sandbox Walkthrough
If you chose Hosted Sandbox during setup, your environment is already running. Here's what you have and how to explore it.
What the Wizard Built
The setup wizard automated everything:
- Enterprise - Your organizational container for all resources
- Environment - A grouping for your cabinets (e.g.,
dev,staging,prod) - Cluster agent - A monitoring agent deployed to the shared sandbox cluster, scoped to your tenant
- Cabinet - Your isolated space where services run together (
demo-cabinet) - Demo assets - Six production-ready services deployed and configured
- Configurations - Environment variables, ingress routes, and monitoring wired up
Explore Your Dashboard
After the wizard completes, you land on the Codiac dashboard. You should see your environment with demo-cabinet containing all six services showing green health indicators.
Click into any asset to see:
- Pod status - Running, pending, or failed containers
- Replicas - How many instances are running
- Version - Which image version is deployed
- Live health - Real-time status updates via the cluster agent
Your Running Services
What you see depends on which stack you chose during setup:
Full Stack:
| Service | What it does | Try it |
|---|---|---|
| codiac-example | Sample web API | Access the service URL from the dashboard |
| PostgreSQL | Relational database | Connect via pgAdmin |
| pgAdmin | Database management UI | Open the ingress URL to manage your database |
| Grafana | Monitoring dashboards | Open the ingress URL to view metrics |
| Prometheus | Metrics collection | Backing Grafana dashboards automatically |
| Redis | In-memory data store | Used by the example app for caching |
AI Stack:
| Service | What it does | Try it |
|---|---|---|
| n8n | Workflow automation | Open the UI to build AI agent workflows |
| PostgreSQL | Relational database | Connect via pgAdmin |
| pgAdmin | Database management UI | Open the ingress URL to manage your database |
| Qdrant | Vector database | Store and query embeddings for RAG apps |
| Redis | In-memory data store | Fast caching and message queuing |
Every service has its own unique HTTPS URL with a TLS certificate generated specifically for your tenant. These are live, accessible services - open n8n to build agent workflows, connect to pgAdmin to browse your database, hit your API endpoints directly from curl or Postman.
This isn't just a demo. Your sandbox is real infrastructure you can use for real work. Run AI agents that need a persistent environment reachable from anywhere. Extend your development setup with services that can't run on your local machine. Prototype before committing to production infrastructure.
Sandboxes are great for learning Codiac and running hosted workloads, but custom asset deployment is restricted on the shared sandbox cluster for security reasons. When you're ready to run your own container images, bring your own cloud and deploy whatever you choose with full control.
Try a Configuration Change
One of Codiac's key features is dynamic configuration - change settings without rebuilding images.
- Navigate to your cabinet in the dashboard
- Select an asset and view its configuration
- Update a config value (e.g., a feature flag or environment variable)
- Redeploy - the asset restarts with the new configuration
This is Codiac's config-on-deploy in action: one image, many configurations.
What's Next
Your sandbox is a real, production-portable environment. Everything you've built here carries over when you're ready to scale:
- Sandbox to Production - Bring your own cloud and migrate your sandbox work
- Dynamic Configuration - Deep dive into Codiac's config management
- System Versioning - Learn about immutable snapshots and rollbacks
Custom Stack Walkthrough
This walkthrough is for teams setting up Codiac with their own cloud infrastructure. You'll create an enterprise, cluster, environment, cabinet, asset, and configure DNS - all from scratch.
Prerequisites
Part 1 and 2
- Basic Codiac Prerequisites
- Follow these steps to log into Codiac, log into your cloud service provider (CSP), and launch the Codiac portal.
Part 3
Part 1: Account Setup
In this part, you create:
- An enterprise named
main. - A cluster named
test-clusteron your cloud service provider. - An environment named
test-environment. - A cabinet named
test-cabinet.
1. Create an enterprise
You created a tenant when you set up your Codiac account. The next scope to create is the enterprise. An enterprise is a grouping of clusters, assets, and environments.
- Use
codiac enterprise createto create an enterprise:
codiac enterprise create
Name your enterprise main.
2. Create a cluster
The next step is to create a cluster on your cloud service provider.
When the cluster creation is complete, you can log into your cloud service provider to view the cluster details.
- Use
codiac cluster createto create a new cluster on your cloud service provider:
codiac cluster create
- Follow the prompts to:
i. Select your cloud service provider.
ii. Name your cluster test-cluster.
iii. Select the parameters you want to set for your cluster, including the region, node type, etc. For the purpose of this guide, select all the default options for these parameters.
Verify all the parameters are correct, then enter Y to start the cluster creation process.
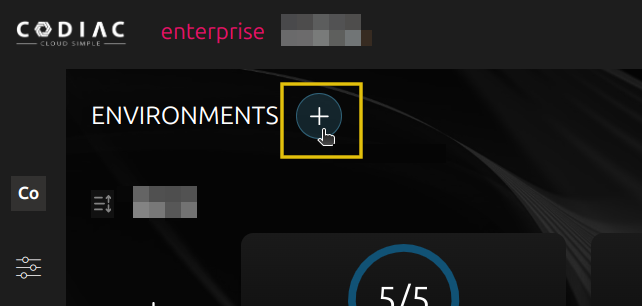
3. Create an environment
An environment is a grouping for cabinets within the enterprise. Environments can span multiple clusters and are a convenient way to group workloads by team, like dev, prod, and demos.
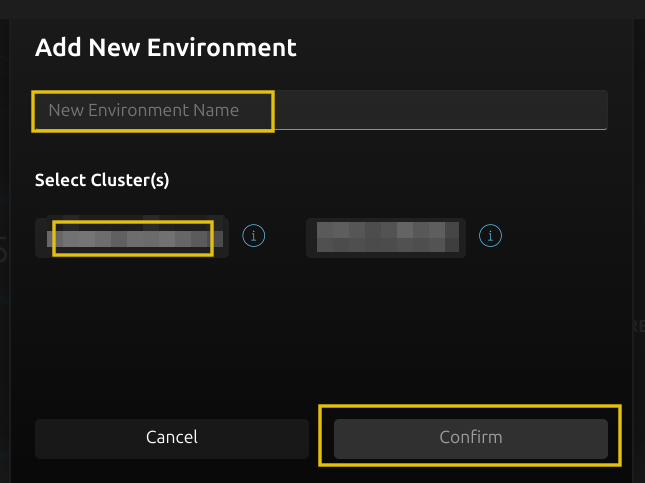
- Click + on the main page to create a new environment.
-
Name your environment
test-environment. -
Select the
test-clustercluster you created in step 3. -
Click Confirm to create the new environment.
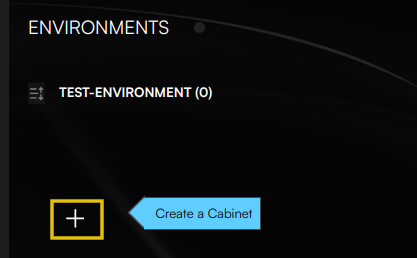
4. Create a cabinet
A cabinet is a space for you to run your collection of assets together as an isolated instance of your enterprise. Cabinets are grouped by environment and are provisioned on a single cluster.
Cabinets are a convenient way to separate projects within an environment being shared by a team. For example, you could create separate sandbox, qa, and staging cabinets in the same environment.
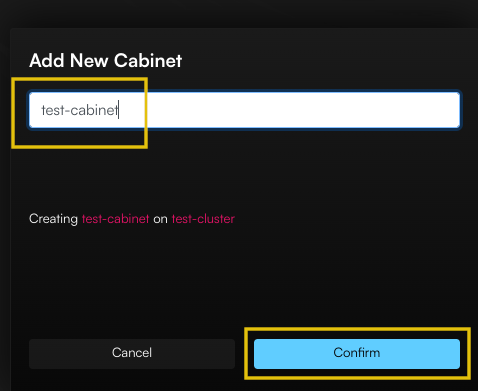
- Click + in your new environment to create a cabinet.
-
Name the cabinet
test-cabinet. -
Click Confirm to create the new cabinet.
You now have a cabinet created with a cluster assigned.
Part 2: Create and Deploy an Asset
This part of the guide walks you through creating and deploying an asset to your Codiac cabinet:
- Use an image from Docker Hub to create an asset with ingress.
- Deploy the asset into your
test-cabinet. - Verify the deployment.
Ingress lets you access the asset from the public internet. Codiac's streamlined ingress creation process means all you have to do is answer a few questions during the codiac asset create process. Codiac handles the rest.
5. Create an asset
An asset is a workload you create from an image stored on a container registry like Docker Hub or Azure Container Registry.
This tutorial specifies the official Docker NGINX image. If you have your own Docker image, feel free to use that instead.
- Use
codiac asset createto create a new asset:
codiac asset create
Follow the prompts to create your test asset:
-
Select your Codiac tenant.
-
Select the
mainenterprise you created in Quickstart 1. -
Select a container registry. For this Quickstart, choose the official DockerHub registry:
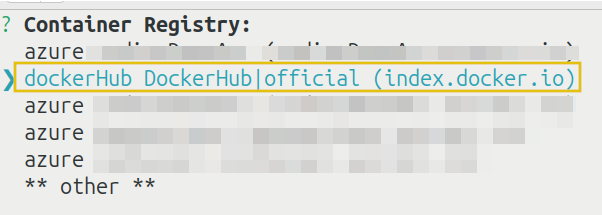
-
Log into Docker Hub with your Docker Hub credentials.
-
Scroll down and select the NGINX image.
-
Name this asset
test-nginx. -
Choose the default port number. For this tutorial, choose port 80.
The default port number is where Codiac will configure ingress. Port 80 is standard for web applications like NGINX.
-
For Port 1: Forwarding? answer
N. -
For Assign another port? answer
N. -
For Accessible from outside the cabinet (aka: has ingress route), answer
Y.
Answering Y tells Codiac to configure ingress, which lets you access the cluster from the public internet. In the future, if you don't want the cluster to have ingress, answer N to this question.
-
For Usage: external answer
Y. -
For Host name on the inbound domain url, answer
quickstart.
This host name will come into play in the next Quickstart, when you configure DNS. The name you set here will be used as the service name for the URL.
- For Will this asset be the base ingress against your DNS, answer
N.
This step is part of Codiac's strategy-based host mapping, which we will cover in the next Quickstart guide. For now, know that you can only have one base ingress URL for your account. You probably don't want it to be this test asset. Save base ingress for your main application and answer N for now.
- For Continue? (y/N), answer
Y.
6. Deploy the asset
Now that you have created your asset and configured ingress, it's time to deploy it into your cabinet.
The first time you deploy an asset, it must be from the command line. After that, you can deploy an asset from the web by clicking and dragging it from the Asset Inventory slide-out panel into your cabinet.
- Use
codiac asset deployto deploy the asset:
codiac asset deploy
- Follow the prompts to:
i. Select your asset from the list.
ii. Log into Docker Hub with your Docker Hub credentials.
iii. Select the Docker Hub asset version.
iv. Select your test-cabinet for the deployment.
v. If necessary: Follow the prompts to log into your cloud service provider account.
7. Verify the deployment
Use one or more of the following methods to verify your asset deployment.
Option 1: List assets (CLI)
Use codiac asset list to list all deployed assets on your account:
codiac asset list
The asset is listed here, along with any other deployed assets.
Option 2: View asset details (CLI)
- Use
codiac asset viewto view details about the asset:
codiac asset view
-
Select your
test-nginxasset andtest-cabinetcabinet. -
Select which details you want to view.
For example, you can view the asset's status:
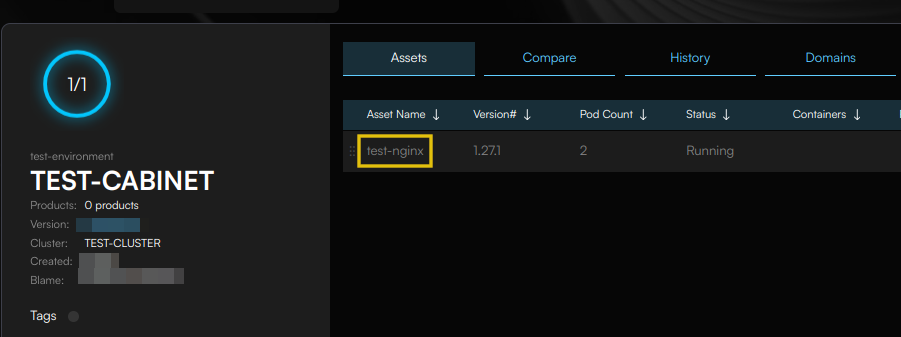
Option 3: View asset details (Web)
From the web, select your cabinet to view the asset details:
Made a mistake? Changed your mind? Use Snapshots to rollback your cabinet to an earlier version..
Part 3: Configure DNS
This part of the quickstart guide walks you through configuring DNS so you can access your Codiac asset from the internet.
8. Host map
- Use
codiac host mapto assign DNS routing to your asset:
codiac host map
- For Domain: enter your domain name. For example,
example.com.
This specifies the domain name Codiac will use for your URL.
- For Scope: select
cabinet, then select themain/test-environment/test-cabinetyou created in the previous Quickstart guides.
This specifies the scope of your domain name. You can scope a domain name to your enterprise, environment, or cabinet.
Codiac Scopes: (tenant [enterprise {environment (cabinet)}])
- A tenant contains enterprise(s).
- An enterprise contains environment(s).
- An environment contains cabinet(s).
- A cabinet contains asset(s).
For this exercise, we will select the least scope (cabinet).
- For Host naming strategy, select
svc.cab.domain.
This step specifies the configuration for Codiac's strategy-based host mapping. Codiac has many strategies available, depending on how you want to access your asset.
This particular host naming strategy is:
- svc: The service name you set in response to "Host name on the inbound domain url" when you ran
codiac asset createin Quickstart 2:quickstart. - cab: Cabinet.
- domain: Domain name.
For:
- service name:
quickstart - cabinet
test-cabinet - domain
example.com
The URL to access your asset is: https://quickstart.test-cabinet.example.com.
- For Continue? (y/N), answer
Y.
9. Update DNS
- Use
codiac host viewto get your assigned IP address:
codiac host view
- The output of this command ends with the DNS information you need to update your name servers:
- Using this information, update the DNS for your domain name to add or edit:
- An A record with host name * and the
destinationIpaddress. - An A record with host name @ and the
destinationIpaddress.
The process for updating your DNS varies depending on your domain registrar or name server hosting provider. If you need help with this step, contact their support.
10. Verify DNS
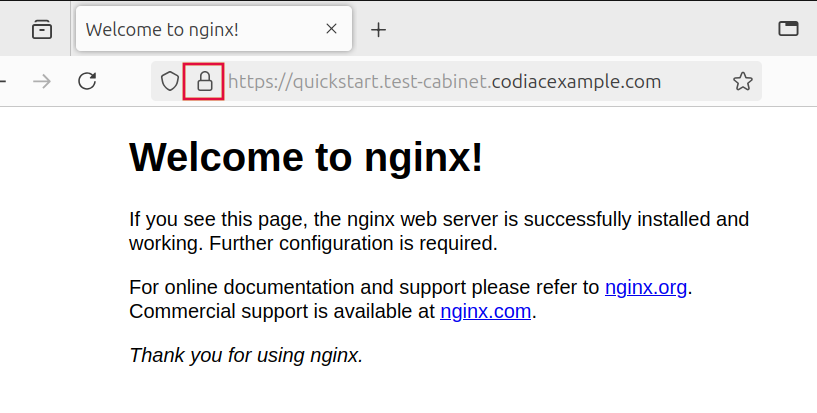
- Open a browser window and go to the URL you chose as your host naming strategy in Step 1.
We chose svc.cab.domain as the host naming strategy and set the following:
quickstartas the service name.test-cabinetas the cabinet name.example.comas the domain name.
Therefore, the URL to access this asset is https://quickstart.test-cabinet.example.com.
The URL to access your asset always starts with https://. We use TLS configured using the industry-standard HTTP-01 challenge methodology. This lets us create a self-signed SSL certificate for all Codiac ingress routes.
- The default NGINX landing page appears: